In dentistry we attend courses and use the best equipment to achieve the best results for our patients. I am a specialist in periodontics in Birmingham and an associate specialist in periodontics at the University of Birmingham Dental school. I work in a few clinics and they all have different radiographic equipment. At the dental school we use plain film radiography and most of the practices I work in I use phosphor plates except one where I use the charged couple device (CCD) to take long cone periapical radiographs.
My patients, and I myself, have often struggled with the CCD due to its rigid nature. Most of my patients prefer the phosphor plates as they are similar to the traditional plain film radiographs and are not as uncomfortable in the mouth especially the lower jaw.
The two main advantages of digital radiography are firstly the speed at which the images can be processed, and secondly the software supplied with the systems which allows you to manipulate the images to clarify them both for the clinician and the patients.
I have found that using the digital radiographs has changed the way my patients understand periodontal disease present in their mouth and what treatment options are available such as dental implants to replace missing teeth or periodontal regeneration techniques for intrabony defects. In a few of the clinics I work in I have been using the VistaScan imaging system from Durr Dental. One of the many advantages of digital radiography in addition to low dose radiation and digital manipulation of the images, is also the ability to layout previous radiographs next to newer ones as a method of comparison which is useful both to the clinician and the patient.
As a specialist in periodontics I have been given the opportunity to give talks to vocational dental practitioners, local dentists and to dental trainees at the University of Birmingham Dental School. During the talks I always emphasise the importance of the basic periodontal examination (BPE). The BPE is a method of screening patients with a standardised periodontal probe, to determine the level of disease present and the treatment required. It does not estimate the level of disease progression.
A BPE code 4 indicates the need of a full periodontal examination. If long cone periapicals are clinically indicated after the periodontal examination, these can be very useful as a patient education tool to show our patients the severity of the bone loss around the teeth and therefore the severity of their periodontal disease. I find this a very good motivational tool for my patients.
Recently the British Society of Periodontology has changed the way we score periodontal disease. Loss of attachment greater than 7mm and the presence of a furcation was denoted as an asterix, this led to some confusion as we would only note the furcation present and did not know the how much disease was present in that sextant (fig 3a). Today we now note the presence of a furcation and the code in the same sextant (fig 3b). The British Society of Periodontology also removed the classification loss of attachment greater than 7mm.
I reviewed one of my periodontal maintenance patients after completing their periodontal therapy approximately four years ago. The patient was referred to me. He was a 58 year old male, his complaint was of abscesses associated with his lower molar teeth. He was keen on saving all his teeth. I performed a periodontal examination and took long cone periapicals of the effected sites. The radiographs showed evidence of furcation involvement of the molar teeth and perio-endo lesions of the LR6 and LL6. A diagnosis of localised severe periodontal disease and perio-endo lesions was made (fig 4). I made him aware that LR6 and LL7 were of hopeless prognosis and that these should be extracted, he was not keen to lose these teeth and therefore a course of non-surgical periodontal therapy was prescribed.
He was given oral hygiene instructions and had a course of initial periodontal therapy. At the periodontal reassessment there was some improvement in his periodontal condition. He was then placed on a three monthly maintenance regime with his hygienist and then reviewed by me at six months and then yearly. At his yearly visit he told me that he had some discomfort on eating associated with the LR6. A long cone periapical of the LR6 showed evidence of further bone loss. This tooth was extracted at last and he then wanted to consider an implant to replace this tooth. After a period of healing (approximately three months) another long cone periapical was taken of the site and utilising the measuring tool on the Durr Dental imaging software the bone height was measured for the placement of a future implant. It is interesting to note that if the patient had allowed me to extract the tooth two years earlier we would have had more bone height for the placement of a 10mm implant. Instead we placed an 8mm dental implant into the site to avoid the inferior alveolar nerve.
Figure 5a and 5b show how the image can be manipulated to see the severity of bone loss present. My patients have found this filter easier to assess the severity of their bone loss and their disease. The implant was left to integrate for a period of three months before a screw retained implant borne crown was constructed to replace the LR6. Again at the time of fit my patient mentioned that he had some discomfort from the LR7 on biting. A baseline long cone periapical of the implant showed that the LR7 had evidence of a perio-endo lesion (fig 6). This time the patient was happy for me to extract this tooth, as he was aware this tooth had a hopeless prognosis.
All of my referring dentists who ask me to place dental implants also receive a long cone periapical of the final implant restoration completed so that they can use this as a reference for their own clinical records. Another advantage of digital radiography is that I can send the referring dentist an A4 print out of the image or email the image as a JPEG so that if they are using the same system or another digital radiographic system they can simply import the JPEG image into the patients records, therefore allowing them to use the image as a baseline for the future.
When I do use plain film radiography, I miss the ability to manipulate the images.
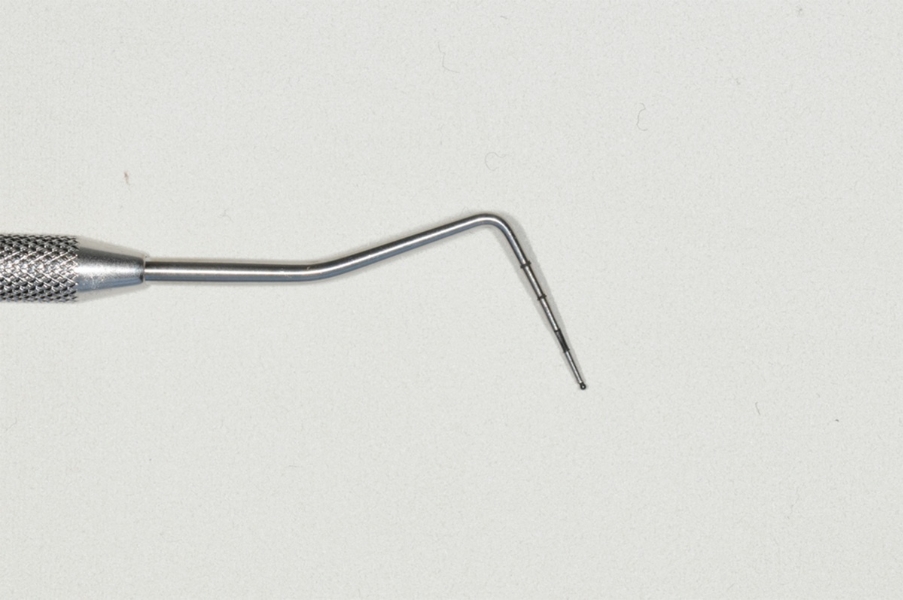
Fig 1: Basic Periodontal Examination Probe.
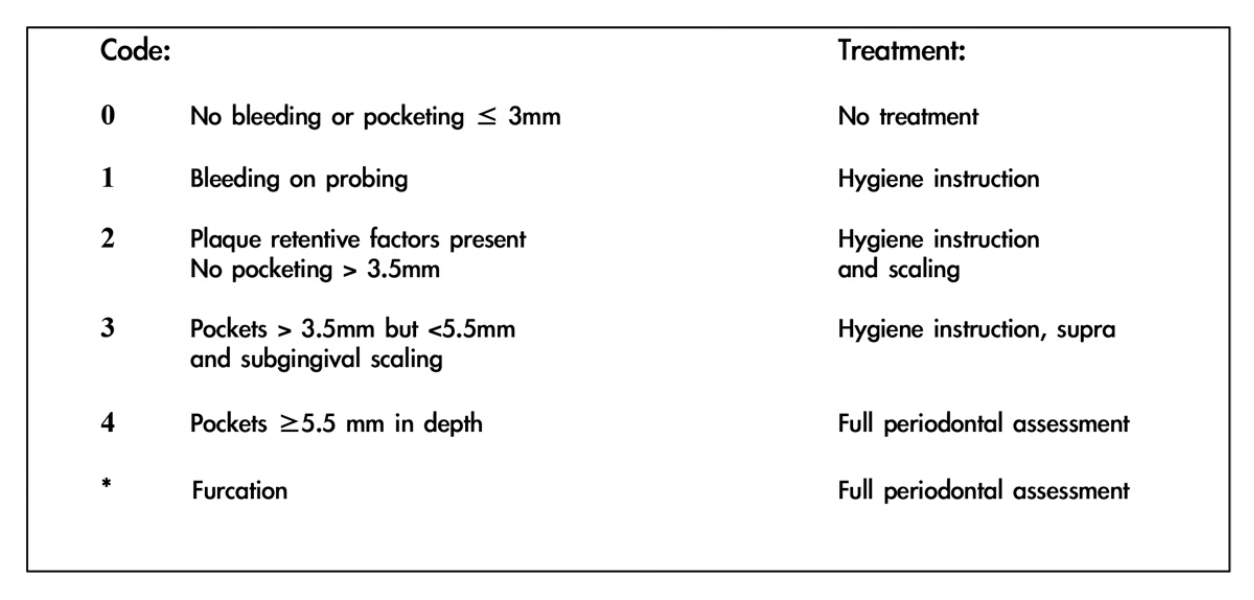
Fig 2: Basic Periodontal Examination chart.
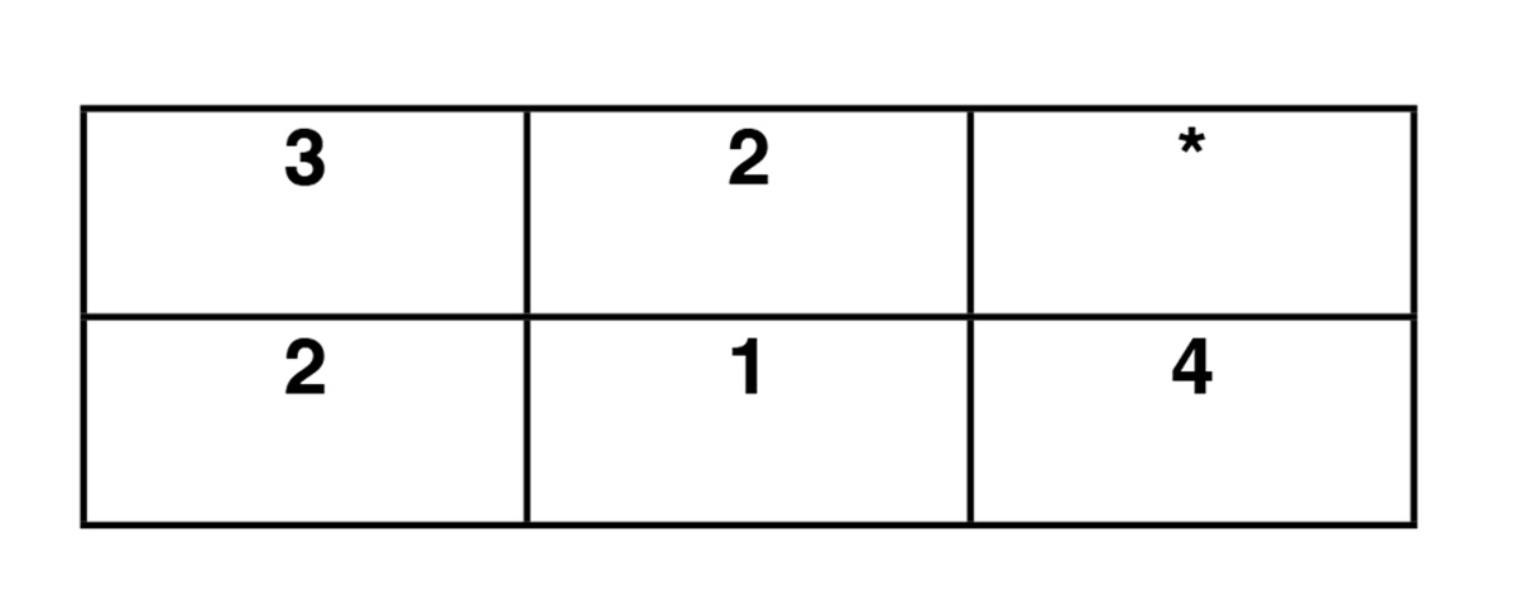
Fig 3a: BPE score in 2011.

Fig 3b: BPE score today.
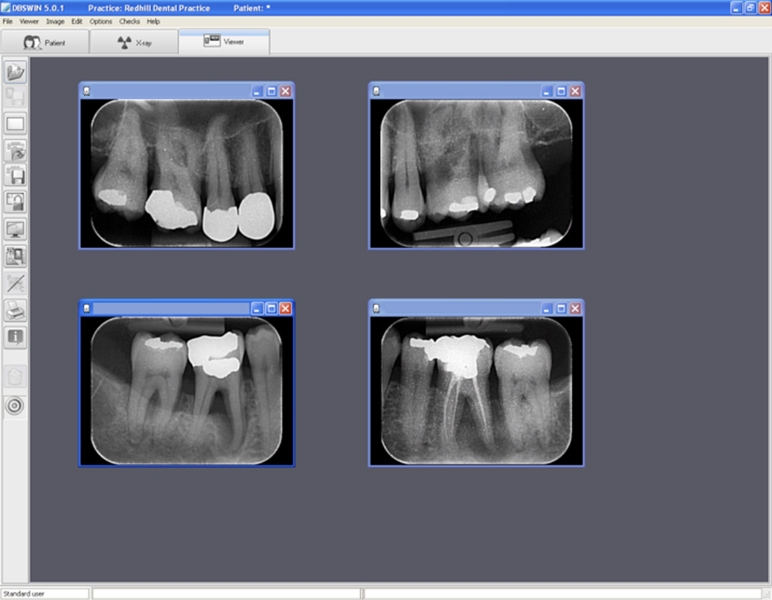
Figure 4: Long cone periapicals.
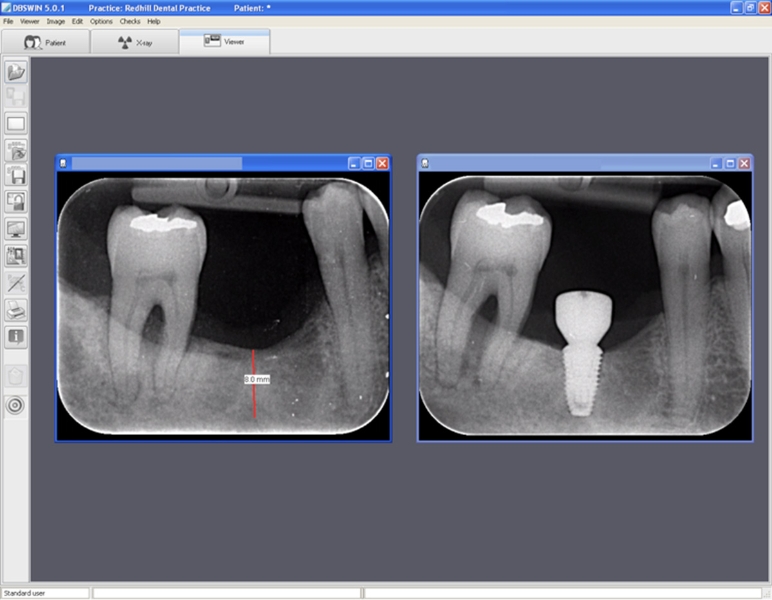
Figure 5a: Long cone periapical 8mm implant placed in the LR6 site.
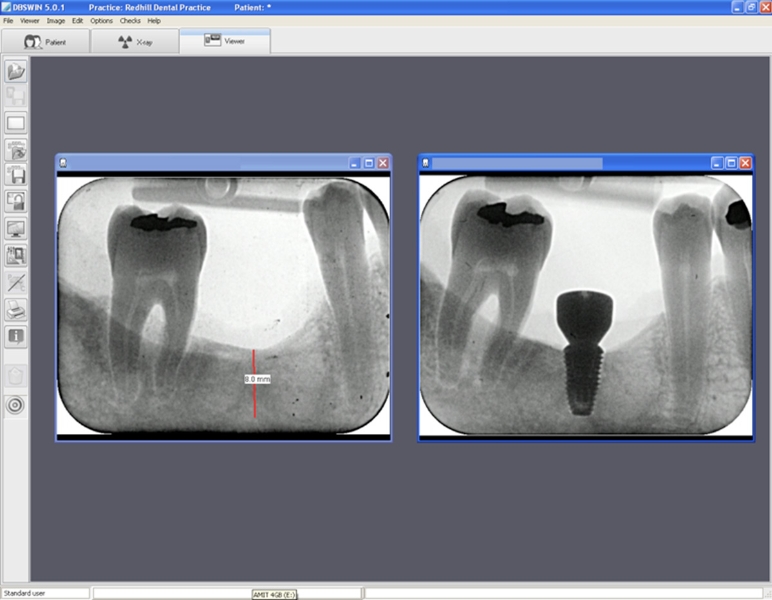
Figure 5b:Manipulated image. Long cone periapical 8mm implant placed in the LR6 site.
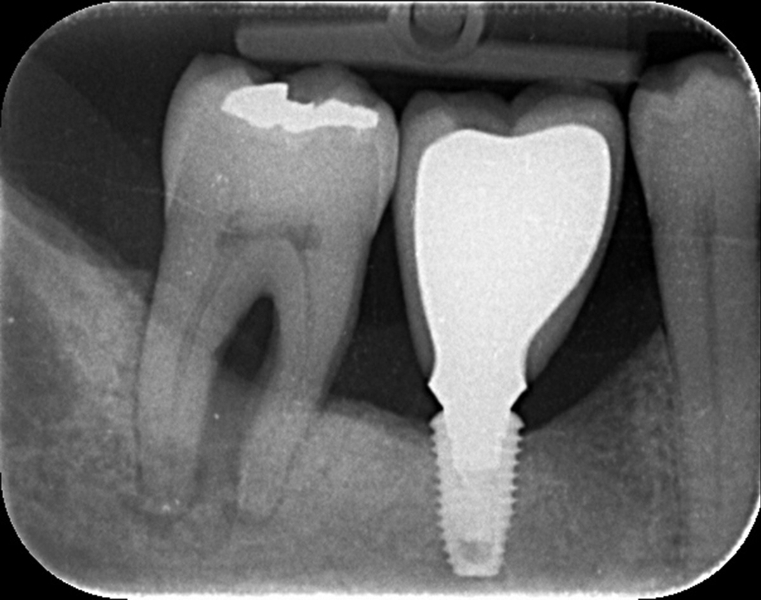
Figure 6: Long cone periapical. Restored implant insitu replacing the LR6. The LR7 shows a perio endo lesion. This tooth was extracted at the time of fit of the LR6.
